Wednesday 30 May 2012

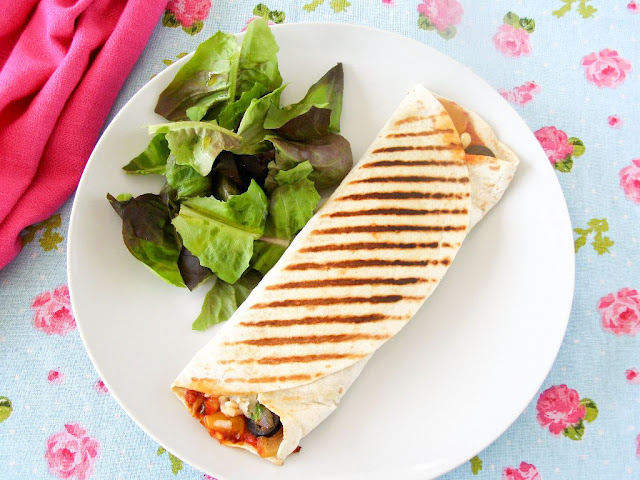
Grilled Roasted Vegetable Pizza Wraps

Vegan Grilled Roasted Vegetable Pizza Wrap

This was just made up for lunch one day when I only had scraps of veg left in the fridge, a couple mushrooms, one pepper and about 1/4 of a large zucchini. As I also had wraps to use, some pizza sauce open and some mozza cheezly about it only made sense to make a grilled pizza wrap sandwich! Turned out absolutely delicious and is really very simple. Obviously you can use whatever veg you like here and the cheezly is entirely optional :-)

Grilled Roasted Vegetable Pizza Wraps: makes 2

2 large wraps

1 small red or yellow pepper, diced
1/4 of a zucchini, sliced and quarters
100g mushrooms, quartered
1 small onion, diced large
2 cloves garlic, left in skins.
1/2 Tbsp extra virgin olive oil
1/8 tsp salt
freshly ground black pepper

30g sliced black olives (2 Tbsp)
15g pine nuts, toasted (1 Tbsp)
fresh basil leaves
pizza sauce, store bought
mozza cheezly, about 60g - optional!

Preheat the oven to 200C / 400F. Place the peppers, mushrooms, zucchini, onion and garlic cloves in a roasting tin. Drizzle over the olive oil and salt and toss well until everything is coated. Pop in the oven for about 1/2 hour until veg are roasted tender and there is no liquid left. Make sure to pull it out a couple times to stir during roasting. When done, remove the garlic, push out the now roasted clove and mash it with a fork then stir it into the roasted veg.

Scrape it all into a large bowl and add the toasted pine nuts and black olives and mix well.


Heat a plain wrap just to make it more pliable then spread with 1 - 2 tablespoons of pizza sauce (most brands are vegan,  I use Marks and Spencers Margherita pizza sauce). then top with the roasted veg mixture and some fresh basil leaves.


If you don't like vegan cheese just leave it as is - it'll still be stunning without it, if you do, it's a lovely addition. Just add about 30g per wrap of grated mozza cheezly, or whatever you like:


Now, I opted to just fold both ends over here but next time I think I will fold the ends over and then grill as it won't be as messy to eat! Get a grill pan really hot and brush the side that has the fold with a bit of olive oil. Place this side first down on the hot grill pan and press down.


When that side has nice grill marks on it and you can hear the cheeze sizzling away, brush the top side with olive oil and flip over. When that side is grilled nicely, remove and enjoy! I just added some plain leaf here with a simple oil and vinegar dressing.

Vegan Grilled Roasted Vegetable Pizza Wrap

Nutritional Information: based on 1 sandwich

Calories: 417
Protein: 10.3g
Fat: 22.2g
Sat Fat: 7.4g
Fibre: 4.8g
Carbs: 45.9g
Sugar: 5.5g
Sodium: 964mg

You Might Also Like:

Grilled Mediterranean Couscous Wrap
with Balsamic Glaze 
Tricolore Griddled Wrap


Thursday 24 May 2012

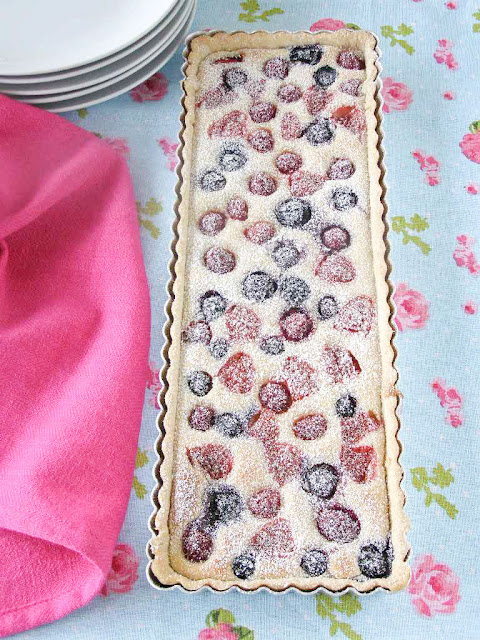
Summer Berry & Almond Cheesecake Tart

Vegan Summer Berry and Almond Cheesecake Tart
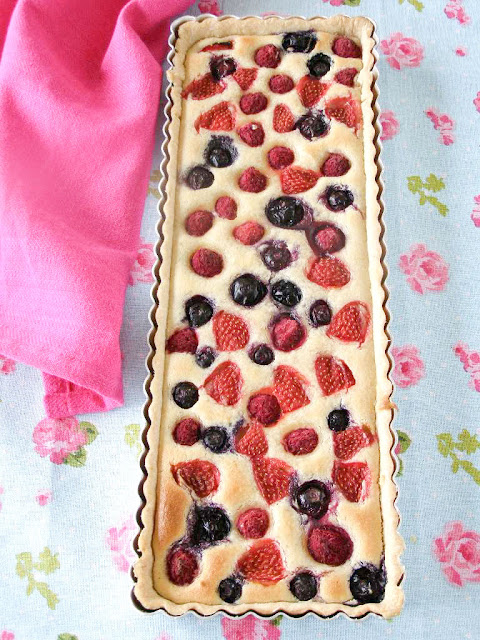
Fresh raspberries, blueberries and strawberries baked in an almond cheese filling in pastry. 
OMG - massive revelation guys - the almond cheese can be made sweet and makes a stunning dessert!!! This was amazing: shortcrust pastry filled with a sweet version of the almond cheese and topped with a mixture of fresh berries. So simple too: line a tin in ready rolled pastry, blitz all the cheese ingredients in the blender, pour in the case and top with fresh berries then bake. I'm really not sure it's possible to get an easier homemade vegan dessert that looks and tastes as good as this! We actually had this for dessert after the previous post of Lemon Pepper Cashew Cutlets, and damn, that was a fine meal :-)


I have been wanting to try that cheese sweet for awhile now, especially as the baked texture is very much like a baked cheesecake but figured a thick slice like cheesecake would be a bit much. Inspired by the size of the Roasted Red Pepper and Asparagus Almond Feta Flan I thought I would try this and it's perfect. Just the right amount of pastry, sweet almond filling and tart berries. Lovely. I'll be making this often, especially for guests as it looks as good as it tastes :-) I'm just gutted I didn't have any vanilla Swedish Glace ice cream when I made this as it would go beautifully with it!

My son in particular loved this, he and my husband tucked in before me as I was busy taking photos. Their reaction pretty much answered this question but I asked anyway, "well, is it bloggable?" Son: "is it bloggable, IS IT BLOGGABLE?!?! OMG mom, YES!!" (Whilst never stopping eating once.) He was just as happy with his leftover slice the next day too :-)


Summer Berry and Almond Cheesecake Tart:

150g ground almonds (about 1 1/2 cups)
50g vegan butter (3 tablespoons)
1/4 tsp salt
1/2 tsp vanilla
1/4 tsp almond extract
1 Tbsp lemon juice
125ml water (1/2 cup)
100g golden caster sugar (1/2 cup) ...and I'm sure regular sugar would be fine.

about 200g ready rolled shortcrust pastry or homemade pastry.
Note- in the UK and Ireland Jus-Rol brand shortcrust pastry is labelled vegan.

fresh blueberries
fresh raspberries
fresh strawberries

icing sugar to dust

Preheat the oven to 180C / 350F. Melt the vegan butter in a small saucepan then place in a bowl. Add the water, lemon juice and extracts and stir. Place the ground almonds, salt and sugar in a blender then pour in the liquid ingredients. Blend until really smooth, make sure to stop once or twice to scrape down the sides with a rubber spatula to get all the ingredients incorporated.

Line a loose bottomed tin with the ready rolled pastry. My tin here is 13 x 4 x 3/4" and to be honest I've lost the metal base to it but just line it with tin foil. Like the Pepper and Asparagus tart the amount of cheese filling here is perfect for this size tin so you may need to double the filling for larger size tart pans. Just line the pan then roll a rolling pin over the top to trim. This would also make really cute mini tarts, just line a mini tart pan with the pastry, fill with the cheese and top with a berry or two and bake.


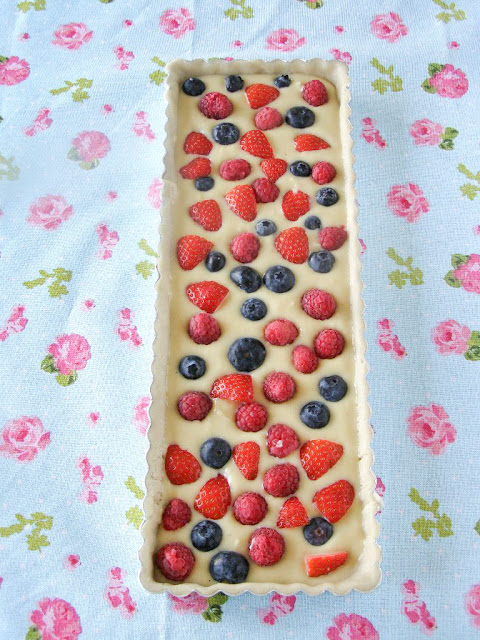
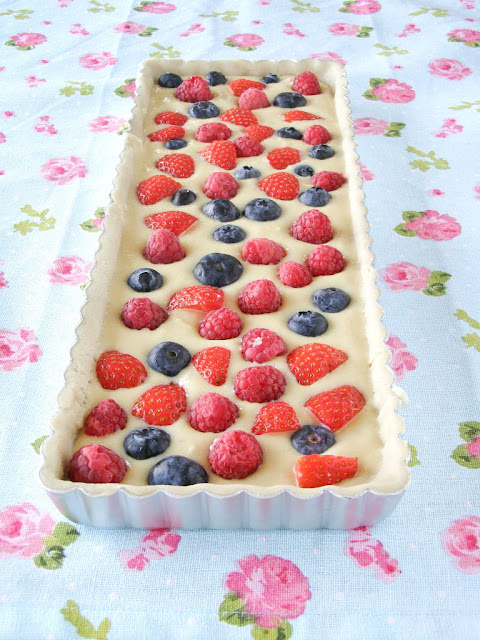
If the almond cheese has been sitting a little long just give it another little blitz to make sure it's mixed well then pour into the case and level it off. Now simply scatter with fresh berries, pressing them down slightly into the "cheese".

Vegan Summer Berry and Almond Cheesecake Tart
This combination of raspberries, blueberries and strawberries was stunning but blackberries would be lovely too!
Vegan Summer Berry and Almond Cheesecake Tart

Pop it in the oven and bake for about 40 minutes. I had to turn the tart around when there was about 15 minutes left to make sure it got evenly baked. Some top bits should start to turn golden brown and it should be firm to the touch.

Vegan Summer Berry and Almond Cheesecake Tart

You can leave it to cool in the tart or remove it after about 10 minutes to eat warm. It's good both warm and cold/room temp - we've had it both ways, I think I'm more partial to it at room temperature. To remove from the tin place a cutting board over the top and flip the whole thing over. Remove the tin then place another cutting board over top and flip the whole thing over again.

Vegan Summer Berry and Almond Cheesecake Tart

Dust the whole surface with icing sugar, slice with a serrated knife as you like - we got 6 generous servings out of this and serve. I liked it with extra fresh berries but like I mentioned above, some vegan vanilla ice cream when this tart is warm would be heaven!!

Vegan Summer Berry and Almond Cheesecake Tart


Nutritional Information: based on 1 serving out of 6

Calories: 420
Protein: 7.2g
Fat: 27.4g
Sat Fat: 5.6g
Fibre: 4g
Carbs: 36.4g
Sugar: 19.3g

American Flag Version - perfect for the 4th of July!

Vegan American Flag Almond Cheesecake and Berry Tart

For this one I've used a rectangular shaped jelly roll pan and made a cookie crust instead of the pastry base. The filling had to be increased to fit this pan then I just used blueberries and raspberries to make the flag :-)

Cookie Crust:

1¼ cups/ 150g vegan graham wafer crumbs (I used digestive biscuits here in Ireland)
2 Tbsp sugar
1/4 cup / 50g vegan butter, melted

Preheat the oven to 350F/180C and line an 11.5" x 8" jelly roll pan with baking paper - grease the sides of the pan well - mine stuck a little bit on the sides.

Mix together the crumbs, sugar and melted 'butter' and mix well, it will be crumbly. Tip it into the pan and press down firmly making sure it is nice and even. I only pressed it into the base here, I didn't want to bother trying to get it up the sides!

Place in the preheated oven and bake for 10 minutes. Remove and let fully cool.

Almond Cheese Filling:

2¼ cups / 225g ground almonds (almond meal)
75g vegan butter, melted (1/4 cup + 2 Tbsp)
1/4 + 1/8 tsp salt
3/4 tsp vanilla extract
1/4 + 1/8 tsp almond extract
1½ Tbsp fresh lemon juice
3/4 cup water
3/4 cup/150g white sugar (I used caster sugar but granulated would be fine)

Simply place everything into a blender and blend until smooth. You will have to stop and scrape down a couple of times but it should get going and be nice and smooth. Tip it all into the prepared base and spread out evenly. Place the berries on top, pressing them into the filling slightly in the design as shown. Pop in a preheated 180C/350F oven and bake for 30-40 minutes. The top should start to look golden and be firm to the touch - my oven takes 35 minutes.
Vegan American Flag Berry Tart with Almond Cheesecake
Transfer to a wire rack to cool then run a knife around the edges and lift the tart out via the overhanging paper. As above I prefer this room temperature but it's good warm and chilled as well :-)
Vegan American Flag Berry Tart with Almond Cheesecake
Happy 4th of July!!!

Monday 21 May 2012

Lemon Pepper Cashew Cutlets

Lemon Pepper Cashew Cutlets
 Beautiful lemony cashew cutlets lightly fried in extra virgin olive oil.

Lemon Pepper Cashew Cutlets
 Before frying

Lemon Pepper Cashew Cutlets with Smoked Paprika Roasted New Potato Wedges
Served with Smoked Paprika Roasted New Potato Wedges and Steamed Broccoli.

These are so incredibly delicious and packed with flavour they don't need any sauce whatsoever. The mild sweet cashews go so well with the tart lemon - they are seriously heavenly. Yeah, I can't believe I just called a nut cutlet that either.

If you follow the daily food diary you'll know I made these quite awhile ago. They tasted just as good then but needed a little tweaking with texture. They held together but were very crumbly and had a bit too much lemon. For these I reduced the lemon juice a little and increased the cashew butter to help binding, flavour wise it's made them even better (something I didn't think was even possible they are that good!) Furthermore it did help with the crumbling but that being said these are still quite crumbly. But then I remembered that they are nut cutlets, they are supposed to be! These are not burgers. Just take a little care when frying - be gentle with the delicate little creatures and they will repay you with deliciousness :-)

Lemon Pepper Cashew Cutlets - makes 4

100g cashews ( 3/4 cup)
65g breadcrumbs* ( 1 cup)
1 medium onion, chopped fine (85g)
1 clove garlic, pureed
1/4 tsp salt
1 Tbsp extra virgin olive oil
2 Tbsp fresh lemon juice, strain out bits.
zest of 1 small lemon
2 Tbsp cashew butter
2 Tbsp chopped fresh parsley
lots of freshly ground black pepper
more extra virgin olive oil to fry

* First, a note on the breadcrumbs as it will make a huge difference in the end product what type you are using. I keep a bag of breadcrumbs in the freezer that I buy in the bakery section of our local grocery store. They are just white natural breadcrumbs made from white bread in the bakery that's gone a little stale. You don't want to use really dry breadcrumbs here or really fresh. If you can get the bags of breadcrumbs in your bakery section use that, and of course, "check vegan" first!*

Place the cashews in a food processor and process until finely chopped OR just chop them up with a knife, this is just easier. You'll want them fairly small but take care not to over process them, you want crunch here.


Tip this into a large non-stick frying pan and gently fry the nuts until fragrant and lightly golden brown:


Transfer these to a large bowl and wipe the frying pan clean. Add the olive oil and bring to the heat then add the finely chopped onion and about 40 grinds of black pepper and gently fry until the onion is very soft and translucent. Add the garlic and fry gently, stirring well for about 30 seconds, take care not to burn the garlic. 

Scrape all of this into the bowl with the nuts and add the breadcrumbs, salt, lemon juice, zest and cashew butter. Mix really well with a fork until it's all mixed up well - make sure the cashew butter is incorporated. It will be crumbly now and look like stuffing but don't worry, you can make cutlets out of this!

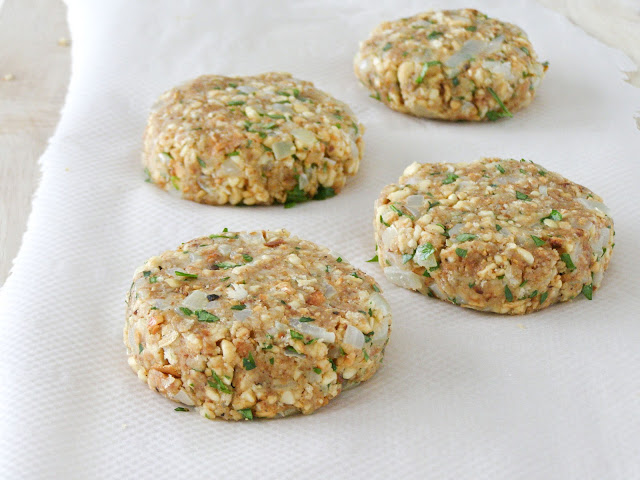
Spoon this mixture into a 1/3 cup measure, pressing down with each spoonful so it's well packed in. Tap and shake the contents out into your hand then squeeze and squish the mixture in your hands like you are making a snowball, you can be hard with it so don't worry! When it holds together place it on a sheet of baking paper and further flatten and shape it into a little cake. Repeat with the rest of the mixture and it should look like this:


I tend to make these earlier than when I want them and at this point wrap them up individually in cling film and refrigerate them. Then they simply need frying up when you need them - simple!

To cook, heat up a good amount of olive oil in a large frying pan - you want it to cover the whole surface but you are not shallow frying either. I used 1 - 2 tablespoons for my medium size frying pan. Gently place them in the hot oil and turn the heat to low, fry until golden brown on one side then carefully (!) flip them over and fry the other side.

Like I mentioned above these are so packed with flavour they really do not need any sauce and we loved them with these smoked paprika new potato wedges - a lovely combination and perfect with some broccoli.

Smoked Paprika Roasted New Potato Wedges:

about 350g new potatoes, longish ones are best here.
2 teaspoons extra virgin olive oil
1/8 tsp salt
1/4 tsp smoked paprika

Preheat the oven to 200C and line a baking sheet with baking paper. Wash and dry the potatoes then slice them lengthwise into quarters. Place in a bowl and add the olive oil, salt and paprika. Get in there with your hands and toss it really well so everything is coated evenly. 


Place on the baking sheet and roast for 1/2 hour and flip them once half way through. This serves the 3 of us as a side dish but they are so good you may want to double this!!

Oh, and I know I keep showing these plated up with 2 cutlets but that's a lie - we only had 1 each, delicious as they are they are quite calorie dense and very filling! It's just that my plates are bloody huge and one looked so sad on its own :-(


Nutritional Information: based on 1 cutlet out of 4 before frying...

Calories: 287
Protein: 8.2g
Fat: 19.2g
Sat Fat: 3.4g
Fibre: 2g
Carbs: 23.6g
Sugar: 3.5g
Sodium: 260mm

Sunday 20 May 2012

Cinnamon Kissed Banana & Dark Chocolate Muffins

Vegan Banana and Dark Chocolate Muffins

Finally a sweet recipe! With all these salads lately you've probably thought I've gone all healthy on y'all. (Nev-ah!!) Although, I must confess these are just a very simple variation on my Banana White Chocolate Muffins - I've simply replaced the white chocolate with dark and added a touch of cinnamon :-)

So, I was just going to update that post with these but then no one would see it, so here it is! These turned out just as beautiful as the original, the little hint of cinnamon in there is lovely with the banana and dark chocolate.

Vegan Banana and Dark Chocolate Muffins

Cinnamon Kissed Banana & Dark Chocolate Muffins: makes 12

245g plain flour
100g caster sugar
50 grams light muscovado sugar
1 tsp baking powder
1/2 tsp baking soda
1/4 tsp salt
1/2 tsp cinnamon
100g dark chocolate, chopped
100g vegan margarine, melted and cooled slightly.
About 400g very ripe bananas, mashed well - about 3 large.
1 tsp vanilla extract
~egg mixture~
2 Tbsp cornflour
1/2 tsp baking powder
1/8 tsp xanthan gum
2 tsp vegetable oil
100ml water

About 50g extra  chocolate for garnish - optional.

Preheat the oven to 180C/350F and grease a muffin tin or individual silicon muffin moulds, I used a spray as it's so much easier.

First make up your 'eggs' by adding the cornflour, baking powder and xanthan gum in a medium size bowl, slowly whisk in the vegetable oil and water. When all added give it a really good whisk until thick and smoothish - little lumps are ok.

In a large bowl whisk the flour, sugars, baking powder, soda and salt. Set aside.

Melt the margarine then transfer to a pyrex measuring jug and stir in the vanilla. Give the egg mixture another whisk then slowly start whisking the margarine into it until it is all incorporated. You should now have a smooth, thick custardy like concoction, whisk in the mashed banana until well mixed.

Now fold the wet ingredients into the dry ingredients with a rubber spatula until just blended, do not overmix, it should not be smooth. If you overmix the muffins will be tough and rubbery. Fold in the chocolate.

Spoon the mixture into the prepared tin about 3/4 full and bake for 20 - 25 minutes or until a toothpick inserted into the middle of one comes out clean. Place tin on a wire rack to cool for 5 minutes then remove the muffins. Serve warm or at room temperature.


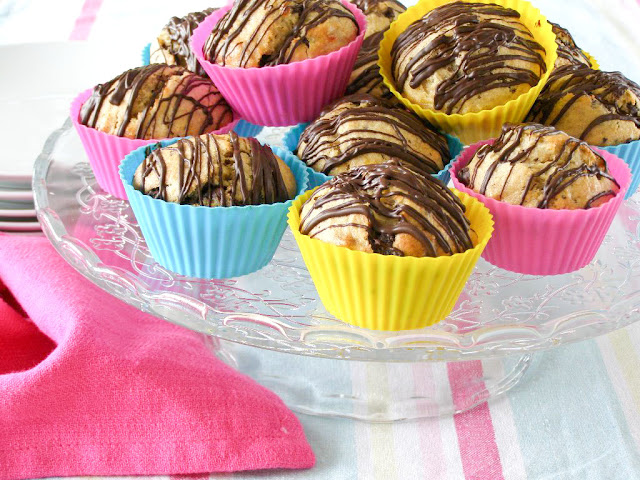
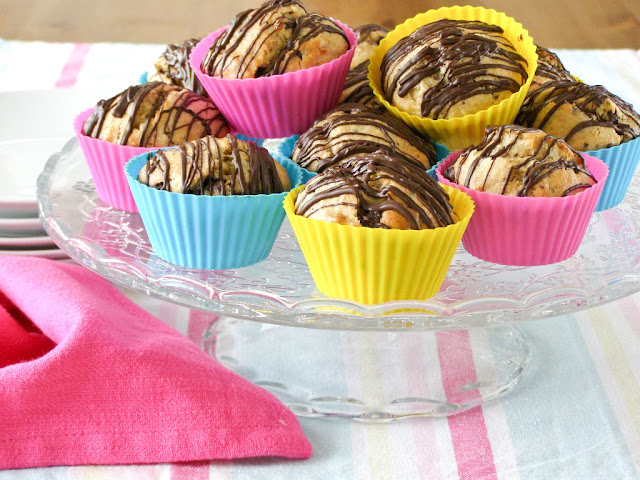
If you would like to add the chocolate drizzle, simply melt about 50g of dark chocolate then drizzle back and forth quickly over the cooled muffins. As I didn't want chocolate all over the cases here and wanted them to stay in the cases as I love their colour, I removed these from their cases, drizzled the chocolate on then popped them back into the cases once the chocolate had set.

Vegan Banana and Dark Chocolate Muffins


Nutritional Information: 
Based on 1 with no drizzle, with drizzle in brackets:

Calories: 196 (218)
Fat: 3.5g (4.9g)
Sat Fat: 1.7g (2.6g)
Protein: 2.7g (2.9g)
Carbs: 38.8g (40.9g)
Sugar: 18.9g (20.9g)
Fibre: 1.8g (2.1g)
Sodium: 96.2mg (96.2mg)


You Might Also Like:

Healthy Banana and Orange Dark
Chocolate Chunk Muffins
Banana White Chocolate Muffins


Tuesday 15 May 2012

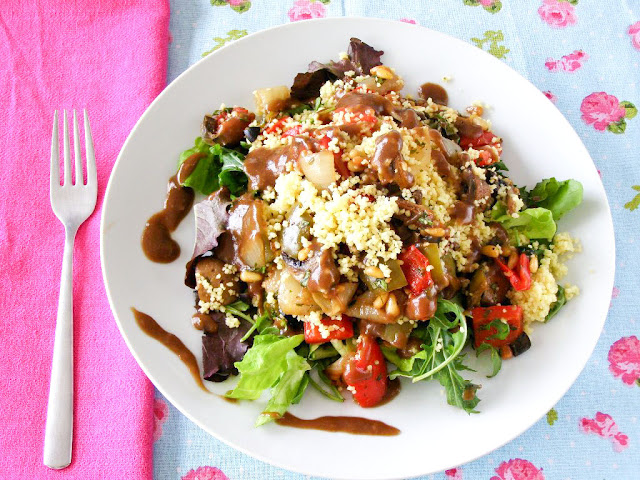
Roasted Mediterranean Vegetable Couscous Salad with Balsamic Dressing

Roasted Mediterranean Couscous Salad with Balsamic Dressing
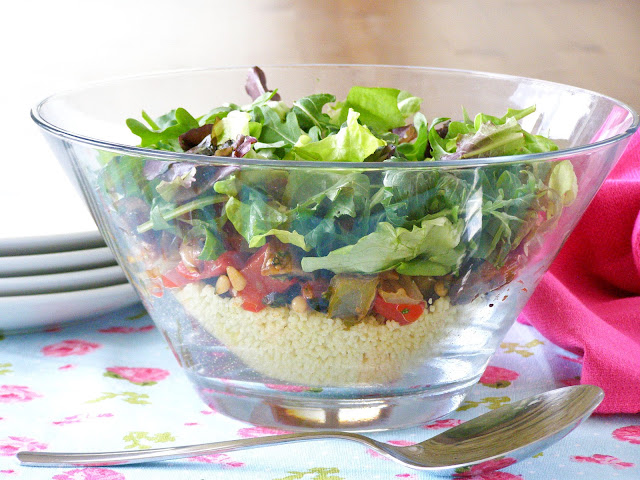
Layered bowl of seasoned couscous, roasted veg with toasted pine nuts and black olives and mixed leaf served with a balsamic dressing.
Roasted Mediterranean Couscous Salad with Balsamic Dressing
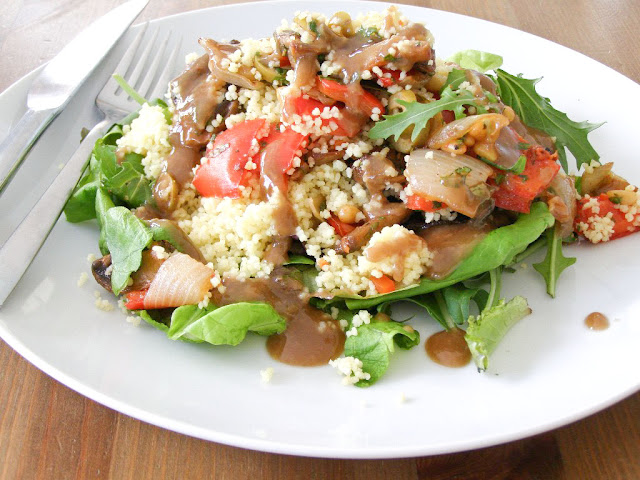
Roasted Vegetable and Couscous Salad with Balsamic Dressing
This plate is from the next day when I made it again. Used only red peppers this time and was out of black olives so used chopped green instead. Still lovely :-)

O.M.G - this salad was stunning! And quite the heavyweight, don't let the salad tag fool you here. I could barely walk after this, beaten by a salad I was! Of course, you don't have to eat the massive portion I did that you see there, I certainly had better intentions at the time but it was just too good and before I knew it, all gone.

I got this idea from Delia's Vegetarian Cookbook which I have had for years and this layered couscous salad has always caught my eye. I've completely changed the recipe to suit my tastes here but the basic idea is the same: couscous, roasted veg then salad and a dressing. The couscous and dressing will need precise measurements but for the roasted veg you can use whatever you like. Normally I would always use zucchini in my roasted veg but didn't have any so I used green pepper instead. I didn't have any aubergine/eggplant but that would go nicely too. Just use what you like - that layer is very forgiving :-)

Roasted Mediterranean Couscous Salad with Balsamic Dressing

Roasted Vegetable Couscous Salad with Balsamic Dressing:

100g couscous, dry weight (that's 1/3 + 1/4 cup)
1 tsp vegetable stock powder, I used Marigold Vegan Bouillon Powder.
200ml water (3/4 cup + 4 teaspoons)

1 Tbsp extra virgin olive oil
1 onion, diced large
8 cherry tomatoes, peeled
1 small red pepper, diced large
1 green pepper, diced large (or halved zucchini slices)
200g mushrooms, quartered
1/4 tsp fine sea salt
black pepper

3 Tbsp extra virgin olive oil
1 Tbsp balsamic vinegar
1 clove garlic, pureed
1 tsp dijon mustard
1/4 tsp salt
freshly ground black pepper

Mixed salad leaves of your choice, rocket is lovely in here!
30g pine nuts (2 Tbsp) toasted
10 black olives, chopped
Fresh basil, about 2 Tbsp chopped

There are quite a few steps with this salad but as they are all needed cool or room temperature you can do these in stages earlier on to make it easier.

First, roast the veg. Preheat the oven to 200C/ 400F. Peel the cherry tomatoes by slicing a small X on the bottom of them and place in a bowl then cover with boiling water. Leave for 5 minutes, drain then plunge into cold water. The skins should easily peel off now, any bits left on just use a paring knife to remove. In a large roasting tin add the tomatoes, onion, peppers, mushrooms and or whatever veg you like!

Drizzle over the olive oil, then sprinkle over the salt and a few grinds of black pepper and toss it all together with your hands until well coated in oil. Pop it into the oven for about 1/2 an hour, give the pan a shake a couple times during cooking and stir the mixture near the end to ensure even roasting. When there is no more liquid and the veg are tinged brown at the edges they are done. Transfer to a bowl and let cool.

Toast the pine nuts in a dry frying pan until golden then transfer to a small bowl to cool down. Add these and the chopped black olives to the cooled veg.

Measure the couscous into a shallow bowl - a bowl with a large surface area is best to ensure even cooking of couscous, I use an 8" square glass baking dish. Heat the water with the veg stock in a saucepan until boiling. Pour this over the couscous, give it a stir then quickly cover with cling film and leave for 5 minutes. Remove the cling film and give it a fluff with a fork then transfer to a large bowl to cool down. Make sure to fluff it up with a fork now and again as it cools to stop it clumping.

To make the dressing, add the olive oil to a small bowl then slowly add the balsamic vinegar, whisking all the while until fully emulsified. Add the Dijon and whisk until all the little mustard dots are gone - it should be completely smooth. Whisk in the pureed garlic, salt and pepper and set aside.

When everything is cool or room temperature, tip the couscous into a large serving bowl. Top with all the roasted veg/pinenut/black olive mixture then top with the mixed leaf.

To serve, first take some of the leaf and distribute equally amongst plates (2 for a massive meal or 4 for smaller meals) then take a large serving spoon and spoon over the veg and couscous. Lastly drizzle over the dressing then serve immediately.

Roasted Mediterranean Couscous Salad with Balsamic Dressing


Nutritional Information: based on a more reasonable 4 servings ;-) Or you could just eat half of it like I did....

Calories: 313
Protein: 7.1g
Fat: 20g
Sat Fat: 2.6g
Carbs: 29.3g
Sugar: 4.9g
Fibre: 3.9g
Sodium: 600mg

You Might Also Like:

Roasted Chickpea stuffed Peppers
with Smoked Paprika Drizzle oil and
Lemon Couscous
Mediterranean Couscous Salad with
Almond Feta

Friday 11 May 2012

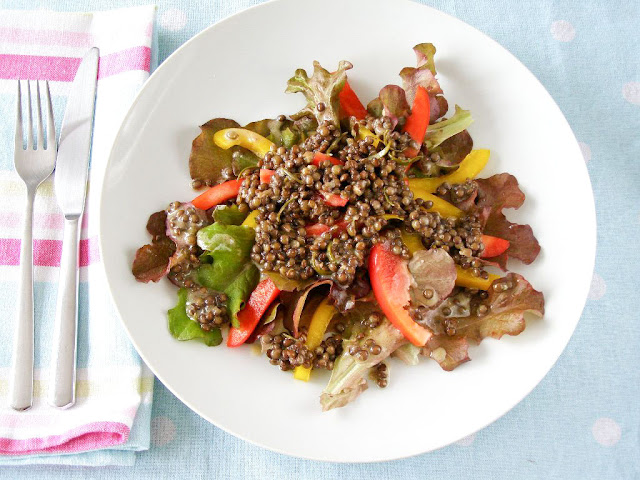
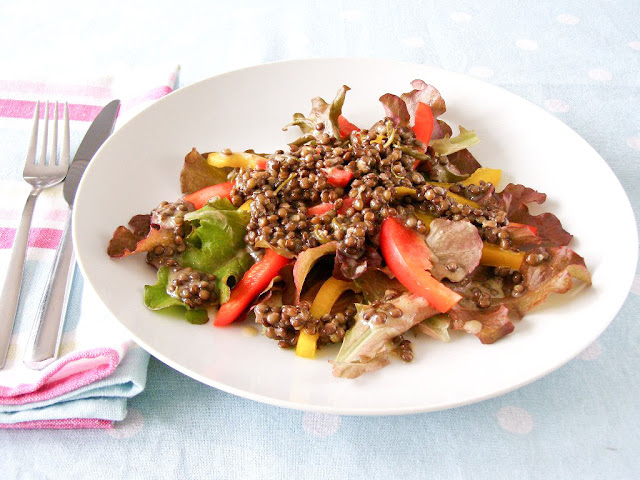
Rosemary Marinated Puy Lentil and Sweet Pepper Salad


Rosemary Marinated Puy Lentil and Sweet Pepper Salad

I'm finally back in the kitchen! This was delicious and is so wonderfully healthy and easy. Puy lentils cooked with rosemary are marinated in a sharp mustard vinaigrette with the rosemary and served over sweet peppers and simple lettuce.

You can use whatever leaf you like here, I don't even know what I've used here as we were given a potted lettuce that we keep and grow on our windowsill (for the record, triple glazed eco-therm windows really retain heat!!)

So, I haven't a clue what it is - if you know let me know though as it's really nice lettuce, even if  it did make my salad look like it was on a bed of Autumnal leaves! (Ha! Those vegans will eat anything!!)

As for the lentils, they'll have to be Puy and they'll have to be cooked from raw - no tins this time as you want them to take some marinating and not get too soft. I've used my favourite mustard dressing here as the marinade, it's a very sharp dressing with vinegar and dijon mustard so the sweet peppers counter that beautifully. Serves 2.


Rosemary Marinated Puy Lentil and Sweet Pepper Salad: 

50g dry weight Puy Lentils
1 sprig fresh rosemary

2 1/2 Tbsp extra virgin olive oil
1 1/2 Tbsp red wine vinegar
1/2 Tbsp dijon mustard
1/4 tsp salt
freshly ground black pepper

Sweet peppers (anything but green)
Large lettuce leaves

Wash and rinse the lentils well then place in a large pot with the rosemary and cover with cold water. Bring to the boil then boil rapidly with the lid off for 10 minutes. Put the lid on and reduce to a simmer for 20 minutes, check they are tender, if not give them a little longer. When they are tender drain, remove the now empty sprig of rosemary and rinse the lentils under cold water - leave the rosemary leaves there. Drain well then place in a bowl.

To make the dressing/marinade add the olive oil to a small bowl, while whisking slowly add the vinegar until it is emulsified. Now whisk in the mustard until smooth then whisk in the salt and a couple grinds of black pepper. Pour this over the lentils, cover with cling film and place in the fridge overnight. You can use it at this stage as well, or just let it marinate a few hours, it'll still taste great. I must also warn you that it WILL look like frog spawn at this stage. Shrugs.

When you are ready to serve simply place a few large lettuce leaves of your choice on a couple plates, top with slices of sweet peppers and spoon over the lentils and dressing. Serve immediately!

Rosemary Marinated Puy Lentil and Sweet Pepper Salad


Source: Dressing based on Tea and Cookies brilliant ratio advice.

Nutritional Information: based on 1 salad

Calories: 262
Fat: 18g
Sat Fat: 2.6g
Carbs: 19.1g
Sugar: 1.8g
Fibre: 8.9g
Sodium: 386mg
- a great source of iron too!

You Might Also Like:

Warm Puy Lentil, Baby Spinach and
Watercress Salad with Balsamic
Dressing
3 Bean Salad with Lemon-Dill Vinaigrette


Wednesday 9 May 2012

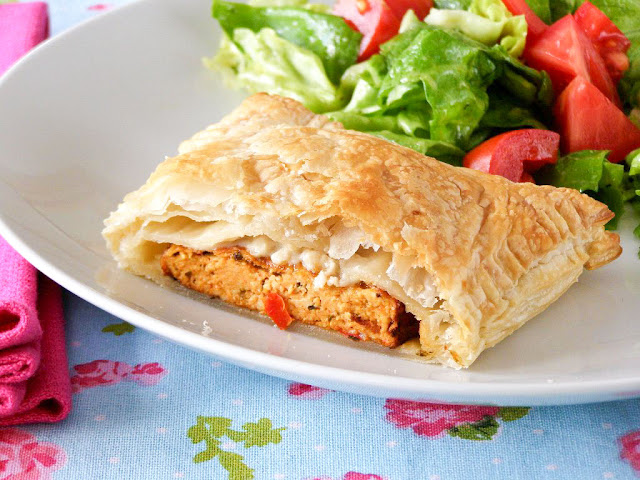
Cheezy Pizza Tofu Fillet in Puff Pastry

Taifun Pizza Fillet in Puff Pastry
Taifun brand pizza tofu fillet, topped with mozza cheezly and baked in puff pastry.

I actually posted this on my daily food diary awhile ago, a place I tend to stick things that are more "simple ideas" than actual "recipes" but I felt this was too good to not get a bigger audience, so here it is!

Plus, I've not been well lately. My son picked up that 'slapped cheek syndrome' or 5th disease as it's otherwise known and while it didn't affect him much I got it. Turns out it can cause lupus to flare up in sufferers and can cause acute anaemia in people who are immune suppressed (me) So, of course I had to go and get BOTH a nasty lupus flare up and anaemia on top of the virus itself.

Needless to say I wasn't doing much cooking and was living off ready made foods and anything easy to grab. I'm feeling better now, still weak from the anaemia but better anyway, but it took awhile. SO, since I haven't got anything lined up to blog I felt I might as well post this up here as it was really, really good - it tasted like a Mediterranean herb sausage roll - amazing! Will definitely make this again for a quick, easy and almost fancy main dish. I also bet it would be good cold and great to take on picnics!

Taifun Pizza Fillet in Puff Pastry


Pizza Tofu Fillet in Puff Pastry: serves 2 (or 1 if you don't give a toss about calories!)

1 Taifun Tofu Pizza Fillet
Cheezly Mozza, about 20g - optional
Ready Rolled Puff Pastry - Jus-Rol is labelled vegan, I used 100g

Preheat the oven to 220C.

Cut out 2 rectangles from 1 sheet of puff pastry one about an inch larger than the fillet and the other one slightly larger again. Place the tofu fillet in the middle of the smaller one and top with the cheezly.


Wet around the edges of the pastry then place the larger sheet over top. Press around the edges then seal with a fork all around the pastry.


Place on a baking sheet lined with baking paper and bake for 15 - 20 minutes or until puffed up and deeply golden brown. Slice in half and serve with a side salad, or just eat the whole damn thing!! You'll see the reason I only have half below but I also must stress I found half with a salad filling and satisfying :-)


Nutritional Information: (for the WHOLE thing and the reason I only have half!!)

Calories: 660
Fat: 43.6
Sat Fat: 17.4g
Protein: 18.5g
Carbs: 35.4g
Sugar: 0.7mg
Fibre: 1.6g
Sodium: 564mg

Some other ideas I've made with the Pizza Fillets:

Simply fried on the side of Tomato and Herb Couscous and Steamed Asparagus.
These are the fillets and that's the Kallo brand stock cube I cooked the couscous in.
Fried and placed in a warm crusty baguette with vegan mayo, lettuce and tomato - delish!